Depending on the size of the booth and roofing option specified, most booths are shipped fully assembled and ready for immediate occupancy. Just set it in place, connect any necessary power and you’re in business.
Standard Shipping Method
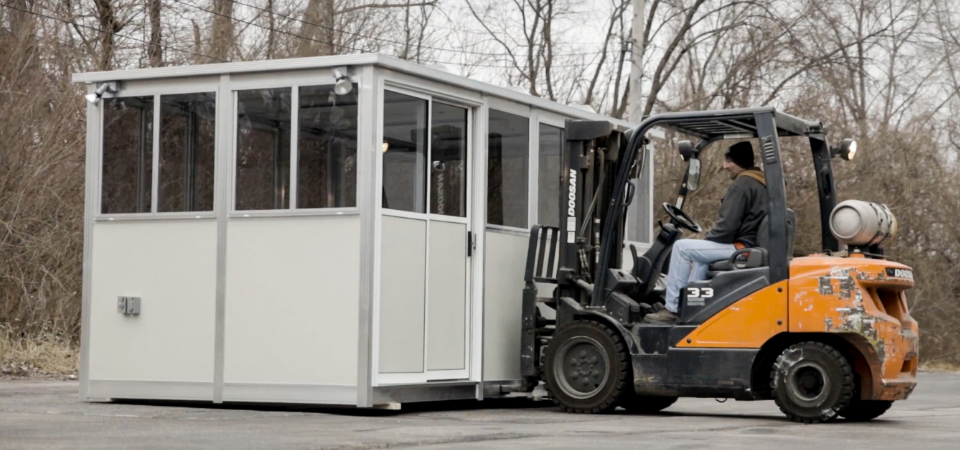
Booths are shipped via flatbed truck or closed van depending on their size and can be offloaded with either a forklift or overhead crane.
Forklift Offloading
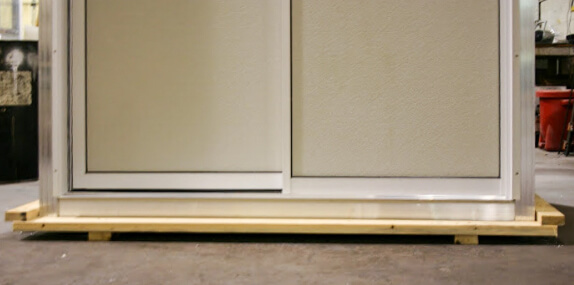
All booths come with support boards that are attached to the booth for delivery. These support boards allow cranes to move the booths from the truck onto their permanent platform.
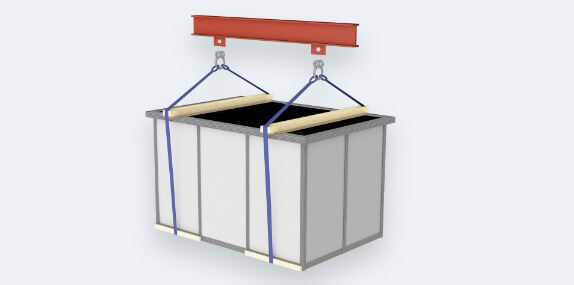
Crane Offloading
Larger buildings may require the use of a qualified rigging crane service who can utilize the process detailed below.
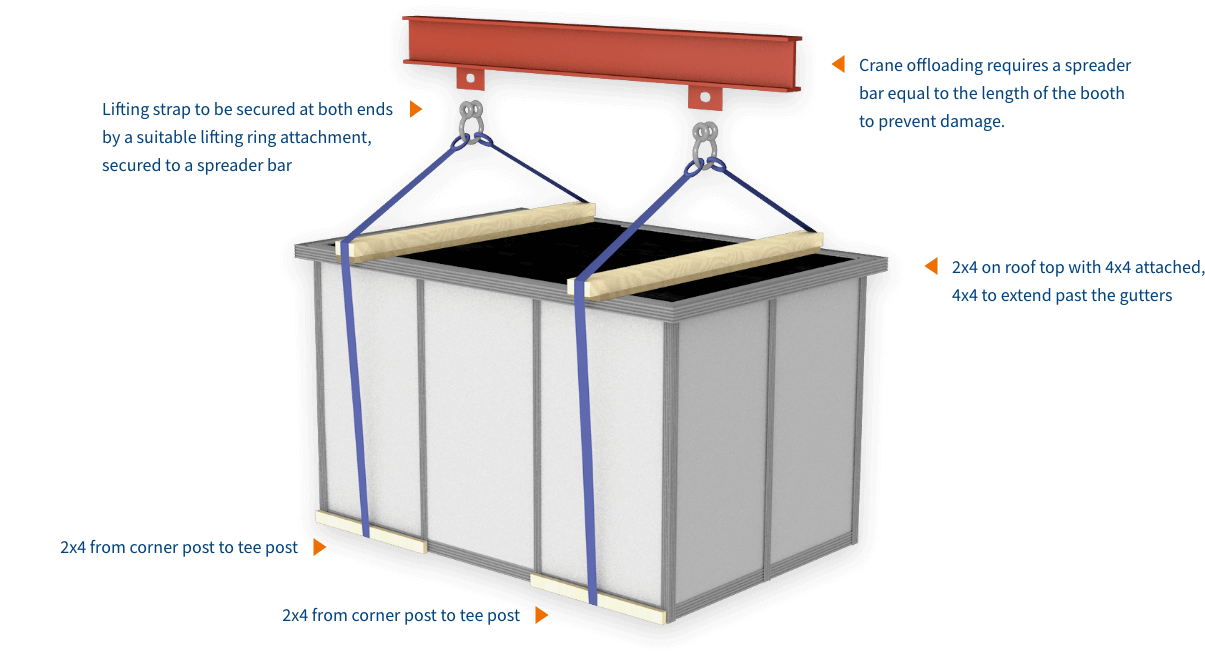
Crane Offloading Guidelines
Portability Options
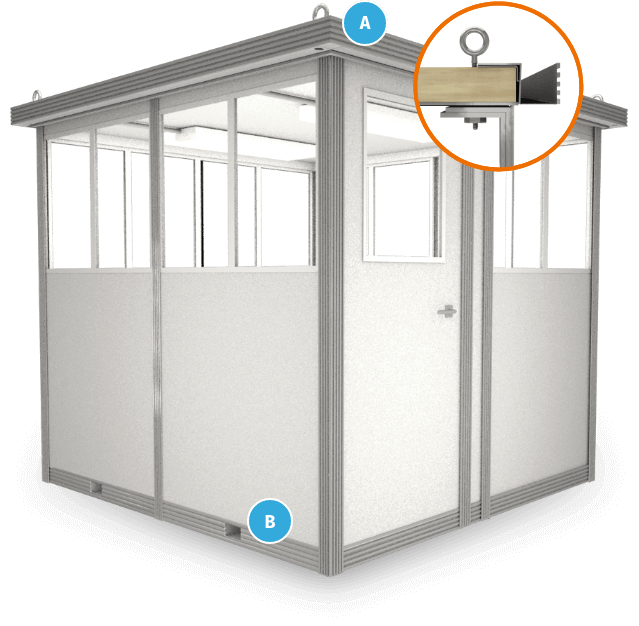
Booths can also be outfitted with forklift pockets or lifting rings that can be used in the offloading process as well as making them more portable.
Lifting Rings
Lifting or hoist rings can be integrated into a booth to allow for overhead lifting by a crane. Eyelets are mounted through structural angle designed to give the booth added structural support.
Forklift Pockets
All booths are built using 4” tall angle frame that can have slots installed to accommodate the forks of a standard lift truck. Depending on the building size, fork extensions may be required to safely transport the booth.
Guidelines for Installation
In preparation for your booths arrival, follow steps 1 through 3 to prepare the space. Once complete, you can schedule your booth’s shipment and complete its installation.
Step 1 - Prep & Compliance Work
In general, all preparatory work and installation work shall be performed by site-contractor and shall be performed in accordance with local and/or state codes.
Step 2 - Pour Concrete base
Pour concrete island minimum of 4” deep. The island should be a minimum of 12” wider than the roofline dimensions to allow a 6” concrete border on each side of the building roofline. Level the pad and install a bollard at each corner of the building to further protect the building from damage caused by traffic.
Step 3 - Set Up Electrical
Provide electrical service to the concrete island. Coordinate stub-up location with prefabricated building layout plans.
Step 4 - Transfer Building
The transfer of your building to its final site will depend on how you had the building shipped and whether or not it included forklift pockets or lifting rings.
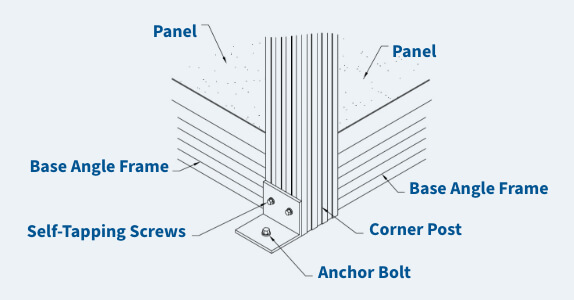
Step 5 - Attach Booth to Pad
Recommended concrete anchor is 1/2” x 4” galvanized or stainless steel, or comply with local codes - whichever is most stringent. Anchors are provided by site-contractor.
Step 6 - Complete Installation
Make final electrical connections and clean the work area.